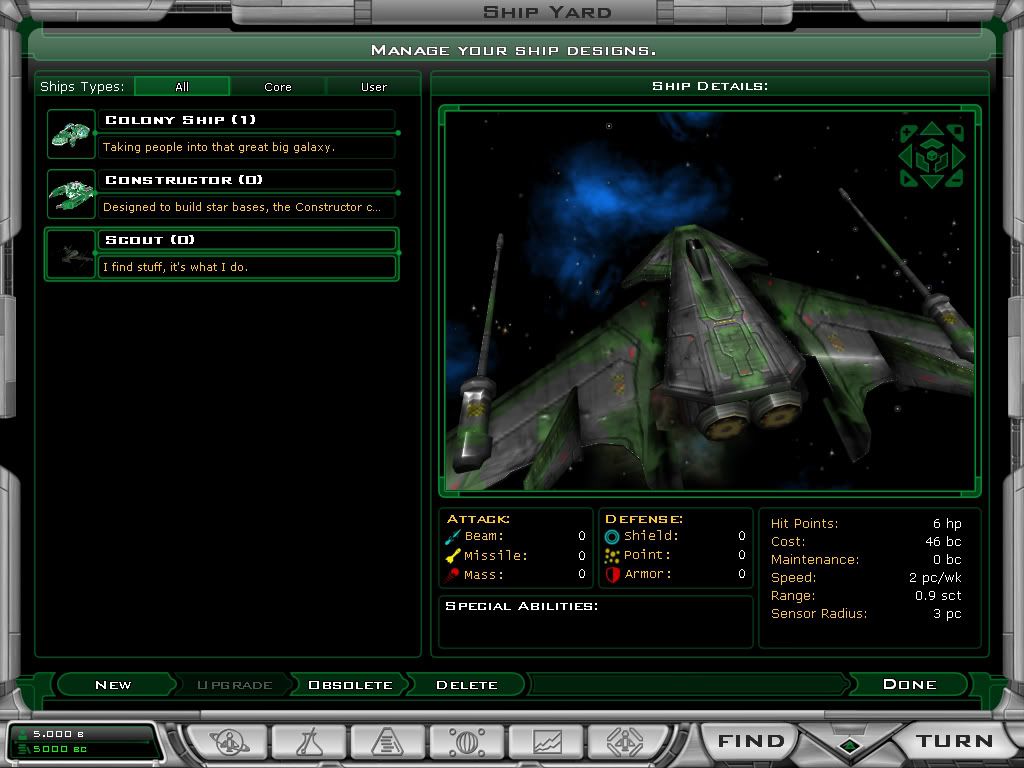
Finally I had a succsess bringing the "Hornet" in the game with WORKING Textures!
Thanks to the user "Vorlone" I reached this "goal". But there was lot of missunderstand till it worked.

So for everyone of you who is using 3ds max 7 or 8 with the pandaplugin(for exporting models and converting textures)
A more detailed Instruction:
1.Make sure that you have a 3d model (Like Max file or 3ds file) with textures
2. To open it klick File, then Import.
Select the Model you like to load
3. Now a Window pops up with the "import options" asking you, what you kike to do.
4. Simply Klick "OK"
5. The "viewing-Window" Perspective should me marked. You see it if it has yellow edged. If not klick it
6. Now klickl File, Export
7. Type your prefered Name for the File and make sure you choose "panda Directx" as Format!
8. A "Pandasofs Directx Exporter"-Window Pops up
9. In the Optionfolder "texture & .fx files" simply select "PNG" at the Option "Fornat"
10. Klick Ok
You get not 2 Files:
1. a 3dx model-file with the name you entered
2. a png-texture file that has the sam name as the original file (the "Source")
Like if the original was "Texture.bmp" the new one should be like "texture.png"
It makes no difference is the letters are capitals or not, just the name itself must match.
11. Copy the Files in Models-Directory of the game. But make sure you safed the orinal x-file for a backup.
In my case it was the Terran scout,. which has the file name: "S0_Tiny_1.x"
Start the Game and see if it worked!
NOTE if you see that your Model is somehow "reversed" in the game, it meand the the axis form them 3d programm are different form the axis in the game.
Then can be fixed if you klick "Left handed Axis" at the "Pandasoft DirectX Exporter"-Window under the optionfolder
"X File Settings" (It's all at the step you are converting your model and textures)
NOTE: If you have a model that was aleady without any textures the program will not spit you at nay texture files by "magic". But fi you have a model and textures and you didn't get a texture file anyway, then you must do the following steps:
....It's a bit difficult for beginners but I try to describe it as good as I can.:
1. Import your model as I described you above
2. Make sure "Perspective" Window is marked (Yellow/colored edges of the "perspective"window)
3. Klick "Rendering" then "Material Editor..."
4. A Window called "Media Editor" Pops up.
5. In this Window you see some "Black&grey Bubbles"
6. The first upper left one shoukd be maked. You see it by white edges arround the Square with that "bubble". If there are no white edged, klick the bubble ones.
7. You see an Icon that looks like an "eyedropper" klick on it to select it
8. Now klick with on your Model in "Perspective"-Window
9. Now you see some "Options" under the the "eyedropper-icon". One of the is called "Map"
10. Open it's details by klicking on "Map"
11. Under "Amount" the Options "Diffuse Color" and "Self Illumination", both of them should be activated (hocked)
If not, then do so.
12. One the right of "Diffuse Color" and "Self Illimunation" there must the Options/Lines like MAP#1 and Map#2
NOT: If it's not so I can't help you, because I don't have that much knowledge of the programm myself, sorry.

13. Selec the "Map#1(.....)"
14. You will see a line "Bitmap:" on theright of it a "bar". If you klick it yiu cen select the file with the texture.
15. Use the "Eyedropper again on the 3emodel and do the same with "Map#2"
16. Now klick in the Icon "Show map in viewpoint". It's small cube with white and blue squares
17. If you have done simply close the "Material Editor"-Window
18. Now Convert the file! (Steps are described above!)
Good luck!


